
If you run a website on HubSpot CMS, your pages are probably missing schema markup the invisible code that tells Google what your content actually is. A product, an article, a local business, an FAQ. Without it, search engines guess. With it, they understand.
The problem: writing schema markup by hand is tedious, easy to break, and Google's documentation is dense enough to put anyone off. Most HubSpot themes ship with little to no Schema.org markup beyond the basics.
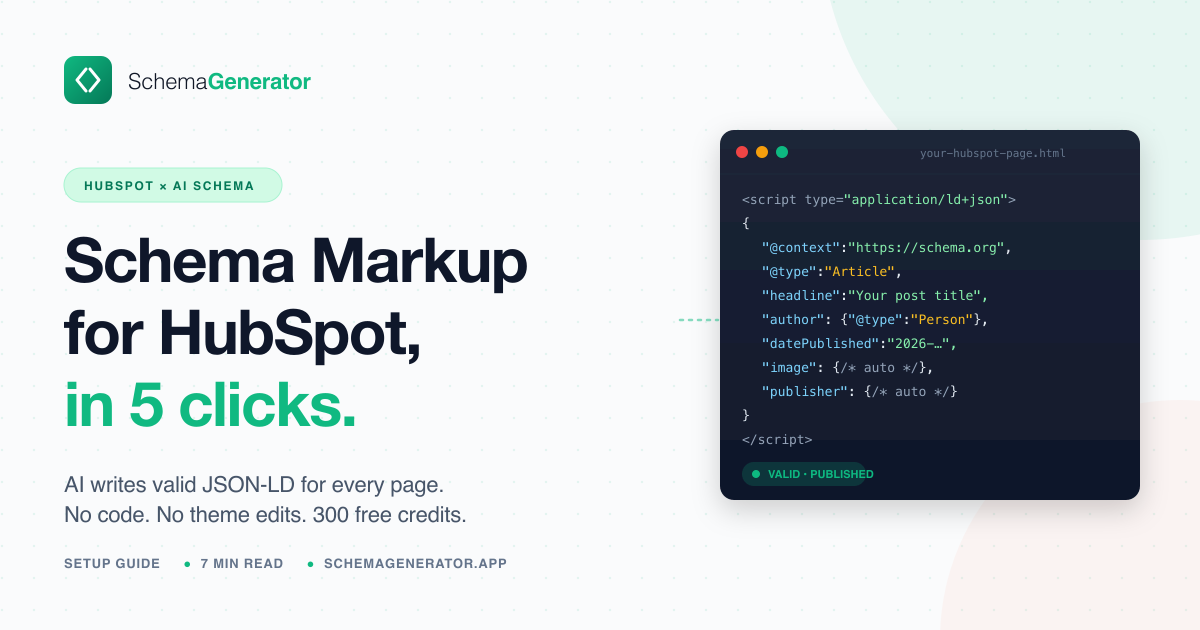
That's why we built Schema Generator for HubSpot an app that installs directly into your HubSpot portal, reads your pages, writes valid Schema.org JSON-LD with AI, and pastes it into HubSpot's <head> for you. No code. No copy-paste. No theme edits.
This guide walks through what it does, how it works, and exactly how to set it up.
What Schema Generator for HubSpot does
Schema Generator is a HubSpot Marketplace app that turns Schema.org JSON-LD from "something you keep meaning to do" into a five-click workflow.
In plain English:
- It scans every CMS page in your portal (landing pages, website pages, blog posts).
- It pulls your business data from HubSpot company name, address, phone, social profiles, contacts so the schema is grounded in your real information, not made up.
- It uses AI to write the right Schema.org type for each page. An About page becomes an
AboutPage. A product page becomes aProduct. A blog post becomes anArticle. A pricing page links to yourOrganization. The app picks the type, fills it in, and validates it against Google's structured data spec. - It injects the finished JSON-LD into the page's
<head>HTML using HubSpot's CMS API. No theme files are touched. Nothing in your design or layout changes. - After upload, it watches your pages every day. If a page changes in a way that breaks the schema (new title, new H1, new FAQ section, content rewrites), it emails you a digest with a one-click "regenerate" link.
Crucially, nothing gets uploaded to your live site until you explicitly click Upload. Everything before that step is read-only.
Why this matters
Schema markup doesn't directly boost your rankings, but it changes what your search results look like. Rich results star ratings, price tags, FAQ accordions, breadcrumbs, business hours, video thumbnails all come from valid schema. AI search engines like Google's AI Overviews, Perplexity, and ChatGPT also pull from JSON-LD to decide whose content to cite. Recent research from BrightEdge found that pages with FAQ schema markup are cited 3.2× more often in Google AI Overviews. If you're investing in HubSpot CMS for SEO, missing schema is leaving real traffic on the table.
How the app works (the 5-step workflow)
Once installed, the app lives inside HubSpot's UI (no separate dashboard, no logging into a third-party site). The whole workflow is five steps:
- Analyze One click. The app pulls the list of every page in your CMS plus your business data from HubSpot.
- Confirm business data Review the company info the app found (name, address, phone, socials, sameAs links). Edit anything that's wrong before the AI uses it.
- Select pages Tick the pages you want schema for. Search and filter included. You can pick one, ten, or every page in the portal.
- Generate & review The app produces a JSON-LD block per page. A 2-column view shows the page on the left and the editable JSON on the right. Live validation flags anything Google won't like.
- Upload One click. The JSON-LD is written into each page's
<head>via HubSpot's CMS API. Done.
The whole thing typically takes under 5 minutes for a 20-page site. Each generation costs 1 credit per Schema.org object a typical page uses 2–3 objects (e.g., a blog post needs Article + BreadcrumbList). You get 300 free credits on install, which is enough for ~100 pages.
Setup guide step by step
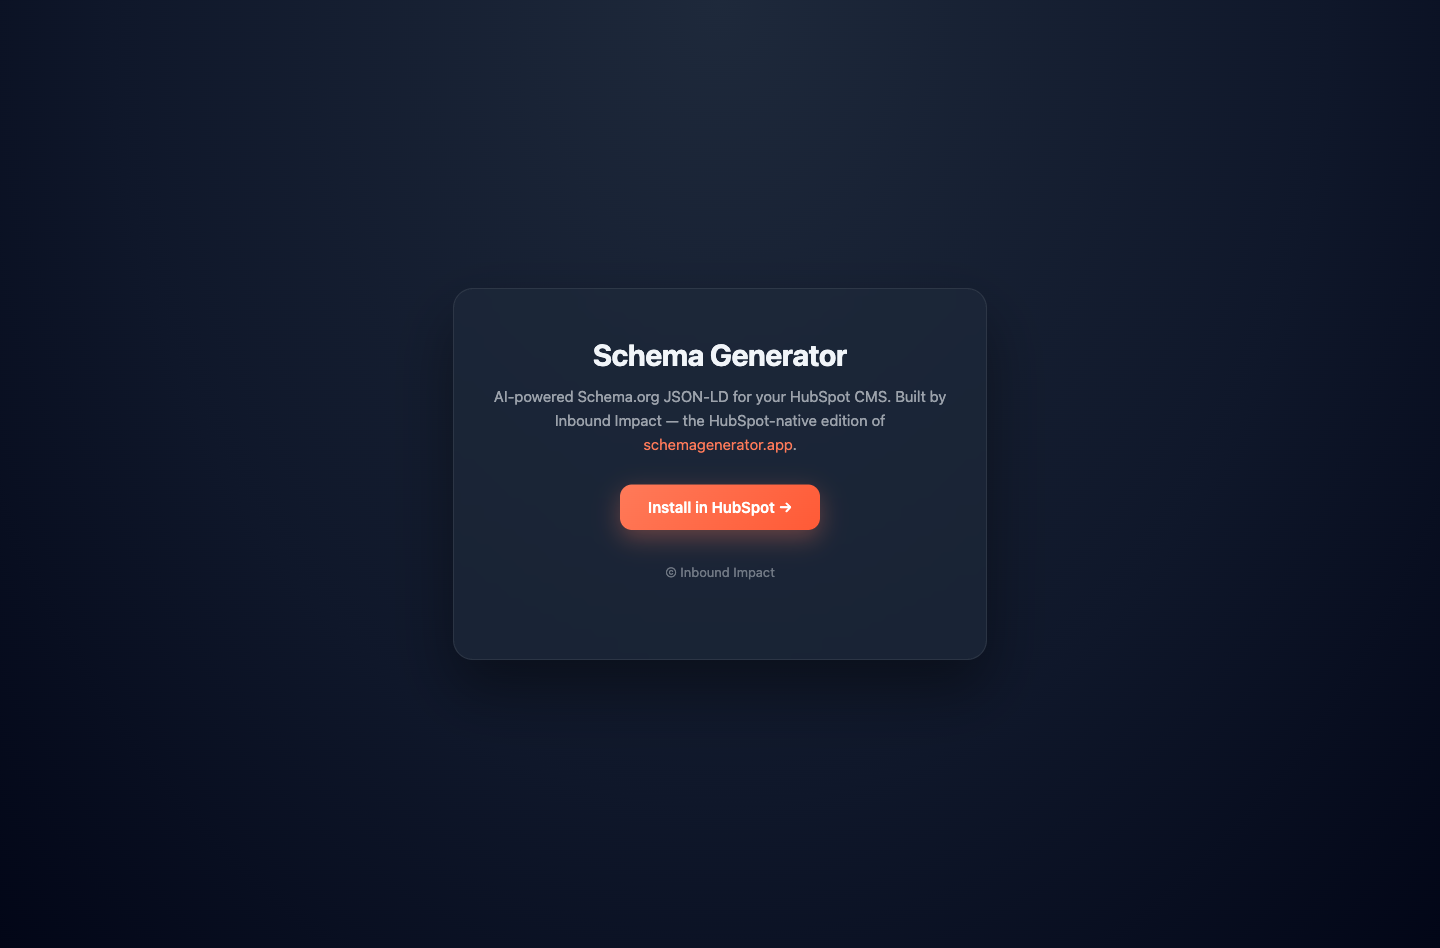
Step 1: Install Schema Generator from HubSpot
Open the install link in any browser: Install Schema Generator for HubSpot.
(Once the app passes HubSpot Marketplace review, this will be replaced by the official marketplace listing URL.)
You'll land on the app's install page. Click the green "Install in HubSpot" button.
HubSpot will ask you to:
- Sign in to the HubSpot portal you want to install into (if you're not already logged in).
- Pick a portal (if you have access to multiple).
- Review the requested permissions. Schema Generator asks for read/write access to your CMS content and read access to your business info the minimum needed to scan pages and inject schema. No contact data, no deals, no sensitive scopes.
- Click Connect App.
Once you authorize, HubSpot redirects you to the success page. You'll see a confetti animation and your HubSpot Portal ID.
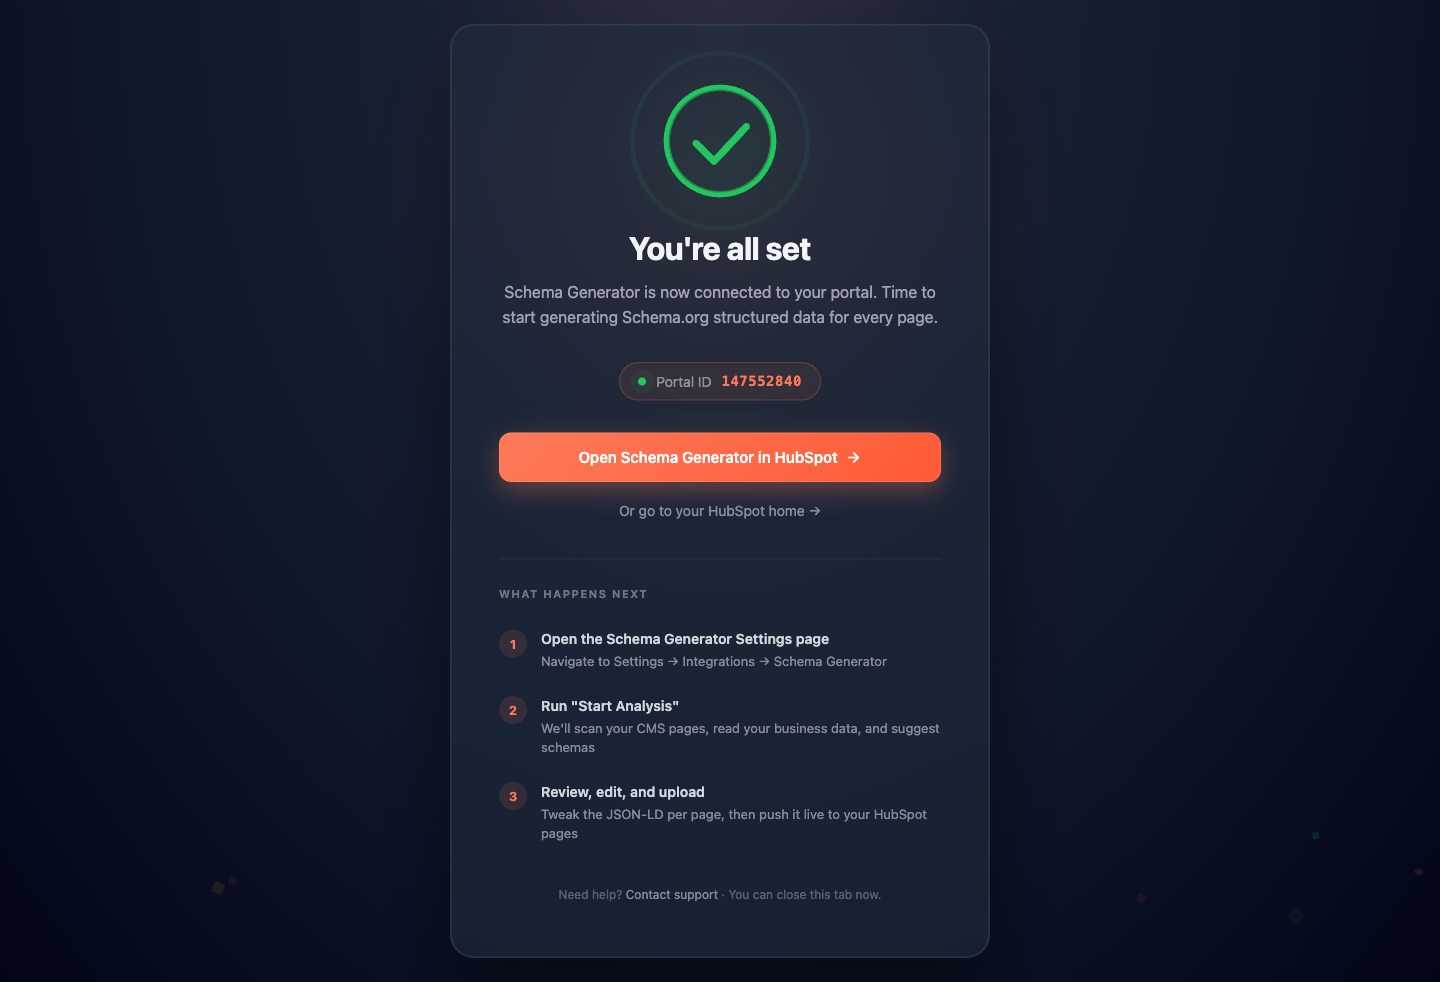
Behind the scenes, the app grants 300 free credits to your portal automatically. That's enough to generate schema for roughly 100 pages (depending on how many Schema.org objects each page needs).
Step 2: Open Schema Generator inside HubSpot
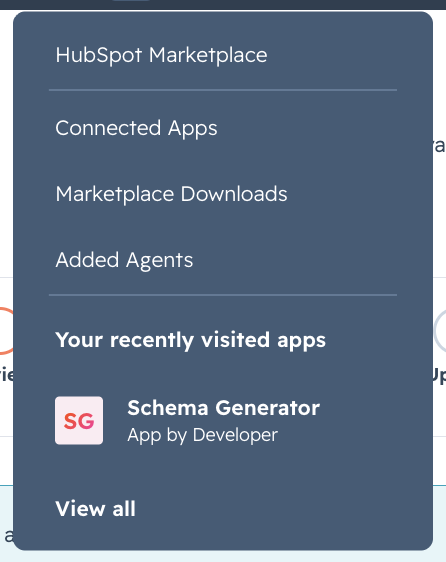
Now go back to your HubSpot portal. Schema Generator appears in two places:
Option A Marketplace icon dropdown (recommended):
- Click the marketplace icon in HubSpot's top navigation (the 9-dot grid icon, top right area).
- Look under "Your recently visited apps" → click Schema Generator.
Option B Settings extension:
- Top right → Settings (the gear icon).
- Left sidebar → Integrations → Connected Apps.
- Click Schema Generator → opens the same interface inside Settings.
Both surfaces show the same 5-step workflow. Use whichever you prefer.
Step 3: Click "Start Analysis"
The first time you open the app, you'll see Step 1 a single button: Start Analysis.
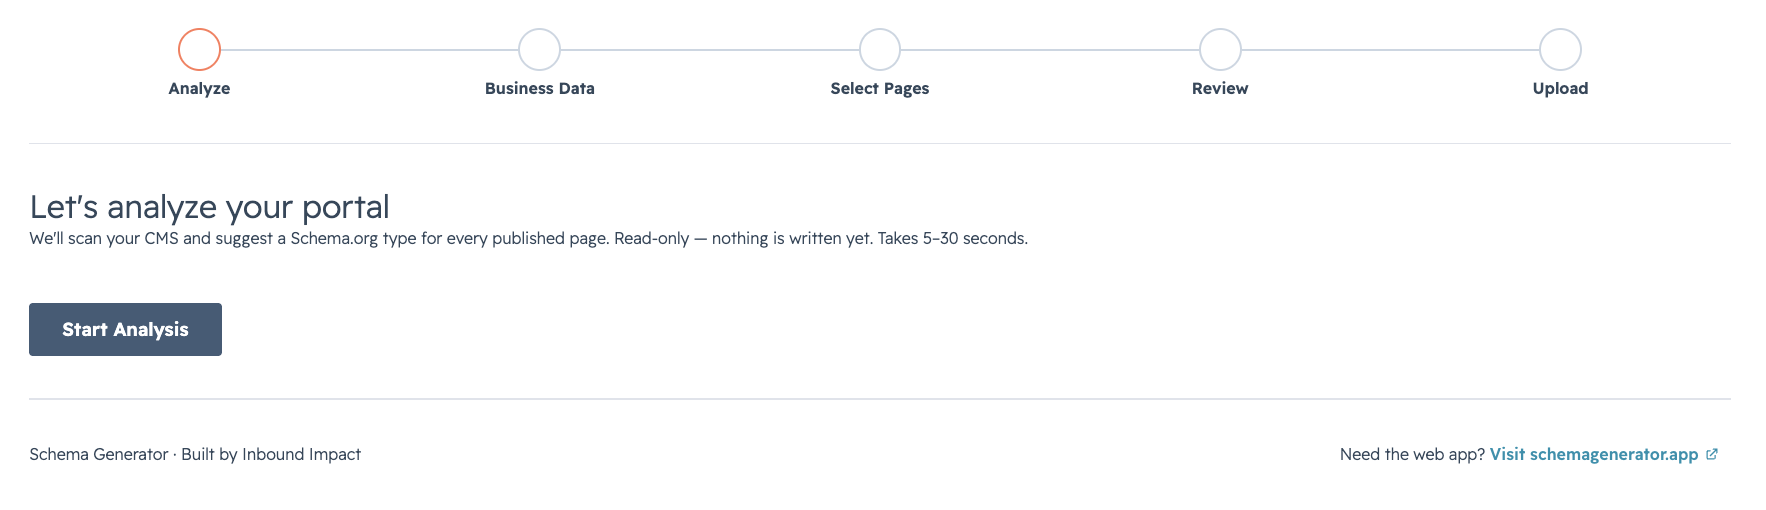
Click it. The app pulls:
- Every CMS page in your portal (landing pages, website pages, blog posts)
- Your company info from HubSpot's Account Defaults (name, address, phone, country)
- Any existing JSON-LD already in your pages (so it can update instead of duplicate)
- Social profile links from your HubSpot account settings
This usually takes 5–15 seconds depending on portal size.
Step 4: Confirm your business data
Step 2 shows everything the app pulled about your business. Review it carefully this data feeds every schema the AI generates, so wrong info here = wrong info on every page.
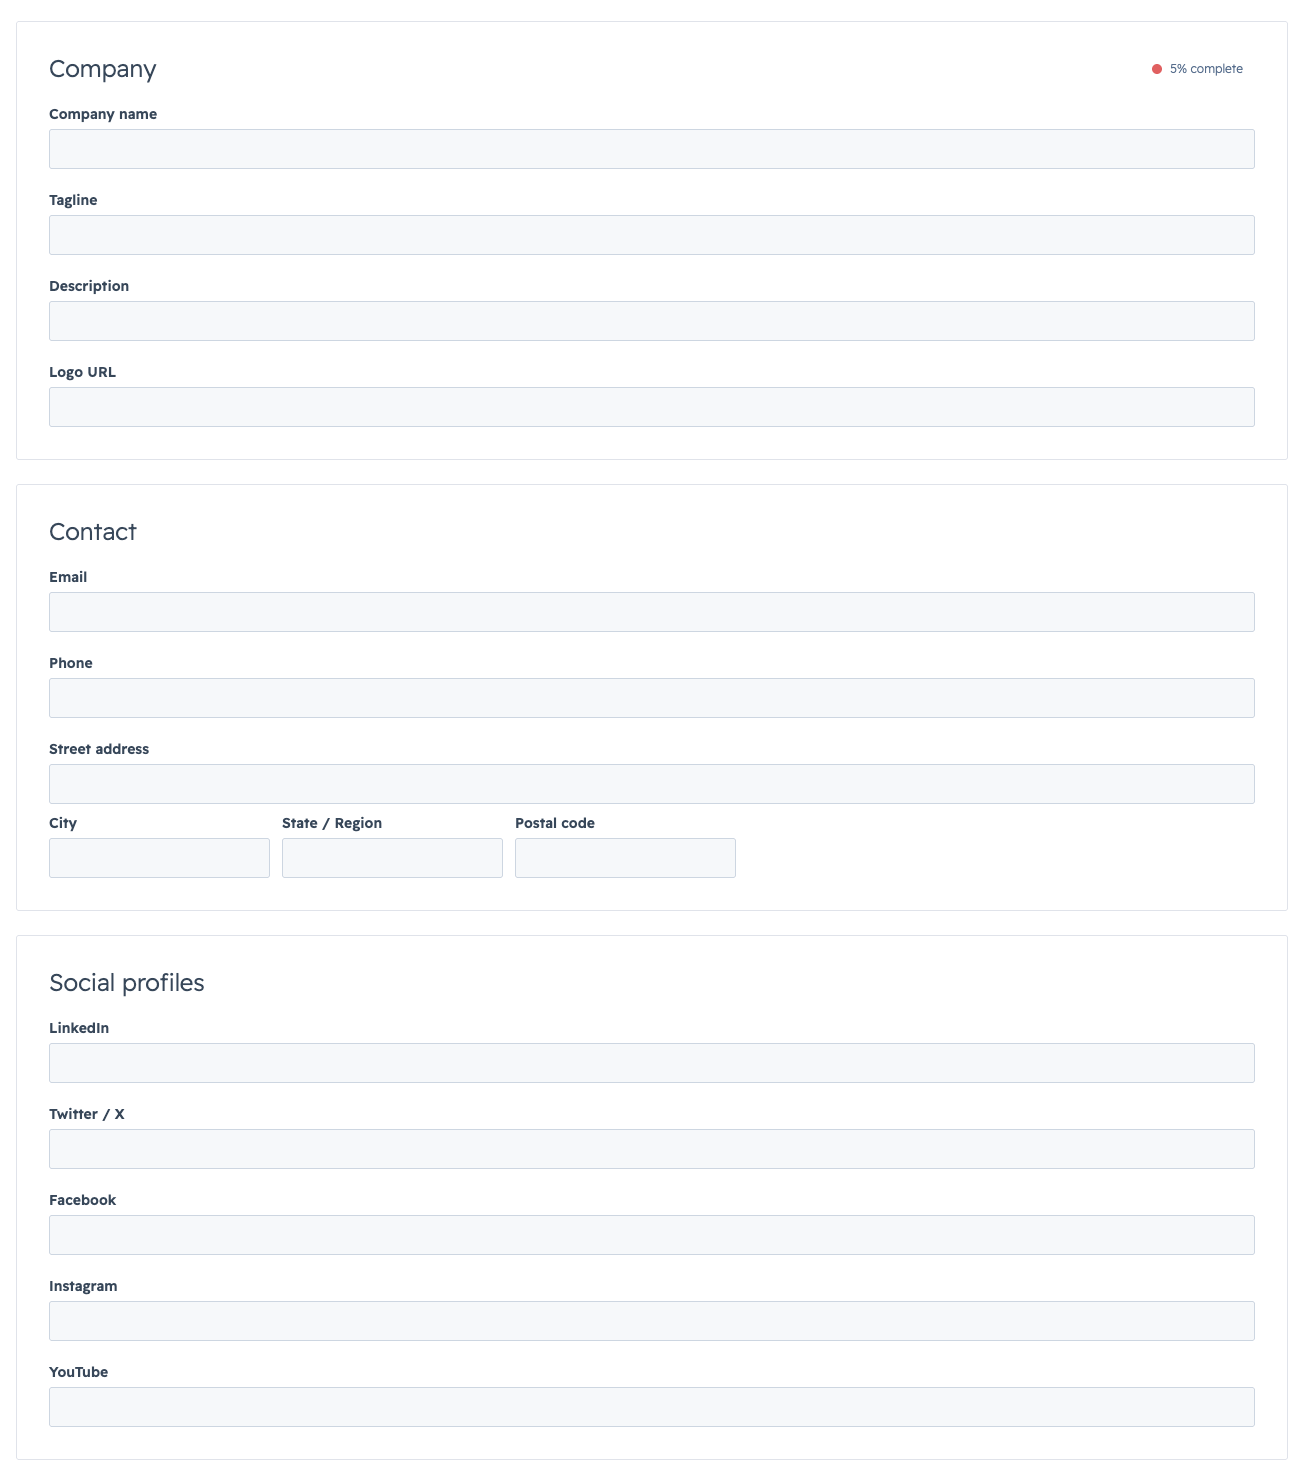
You can edit any field inline:
- Company info name, address, phone, founding year
- Contact info support email, support phone
- Social profiles LinkedIn, Twitter/X, Facebook, Instagram, YouTube (these become
sameAslinks in your Organization schema) - Data sources expander shows where each piece of info came from (Account Defaults, existing JSON-LD on your homepage, HTML scrape) so you can verify.
When you're happy with it, click Continue.
Step 5: Pick the pages you want schema for
Step 3 lists every CMS page in your portal in a searchable table.

You can:
- Search by page title or URL
- Filter by content type (landing page / website page / blog post)
- Select all with the header checkbox, or pick individually
- See which pages already have schema (these get an existing-schema badge)
Tip: start with your highest-traffic pages (homepage, top blog posts, product/service pages). Don't try to schema everything in one go you can come back and do more later.
Once selected, click Generate Schemas.
Step 6: Review what the AI wrote
Step 4 is where the magic happens. For each selected page, the AI:
- Reads the page content via a light crawl
- Picks the right Schema.org type (
Article,Product,FAQPage,LocalBusiness,Service, etc.) - Fills in the JSON-LD using your business data + page content
- Validates against Google's structured data requirements
- Flags anything missing or risky
Generation runs in the background about 1–2 seconds per page. Once it finishes, you land on the review screen with one row per generated schema, status badges per page, and a per-page warnings count.
 Step 5 review screen every generated schema with a status badge.
Click any page to see the full breakdown:

The left column shows page metadata (title, URL, content type, detected schema type, word count). The right column is an editable JSON-LD block with syntax highlighting and live validation. Anything you change is saved instantly.
Common edits at this stage:
- Adjust the
@typeif the AI guessed wrong (e.g.,WebPage→FAQPagewhen the page has FAQs) - Add custom
sameAsURLs the app couldn't infer - Tweak the
descriptionif the AI's first draft is too generic
When everything looks right, move to the final step.
Step 6: Upload to HubSpot
Step 6 is the only step that touches your live site.
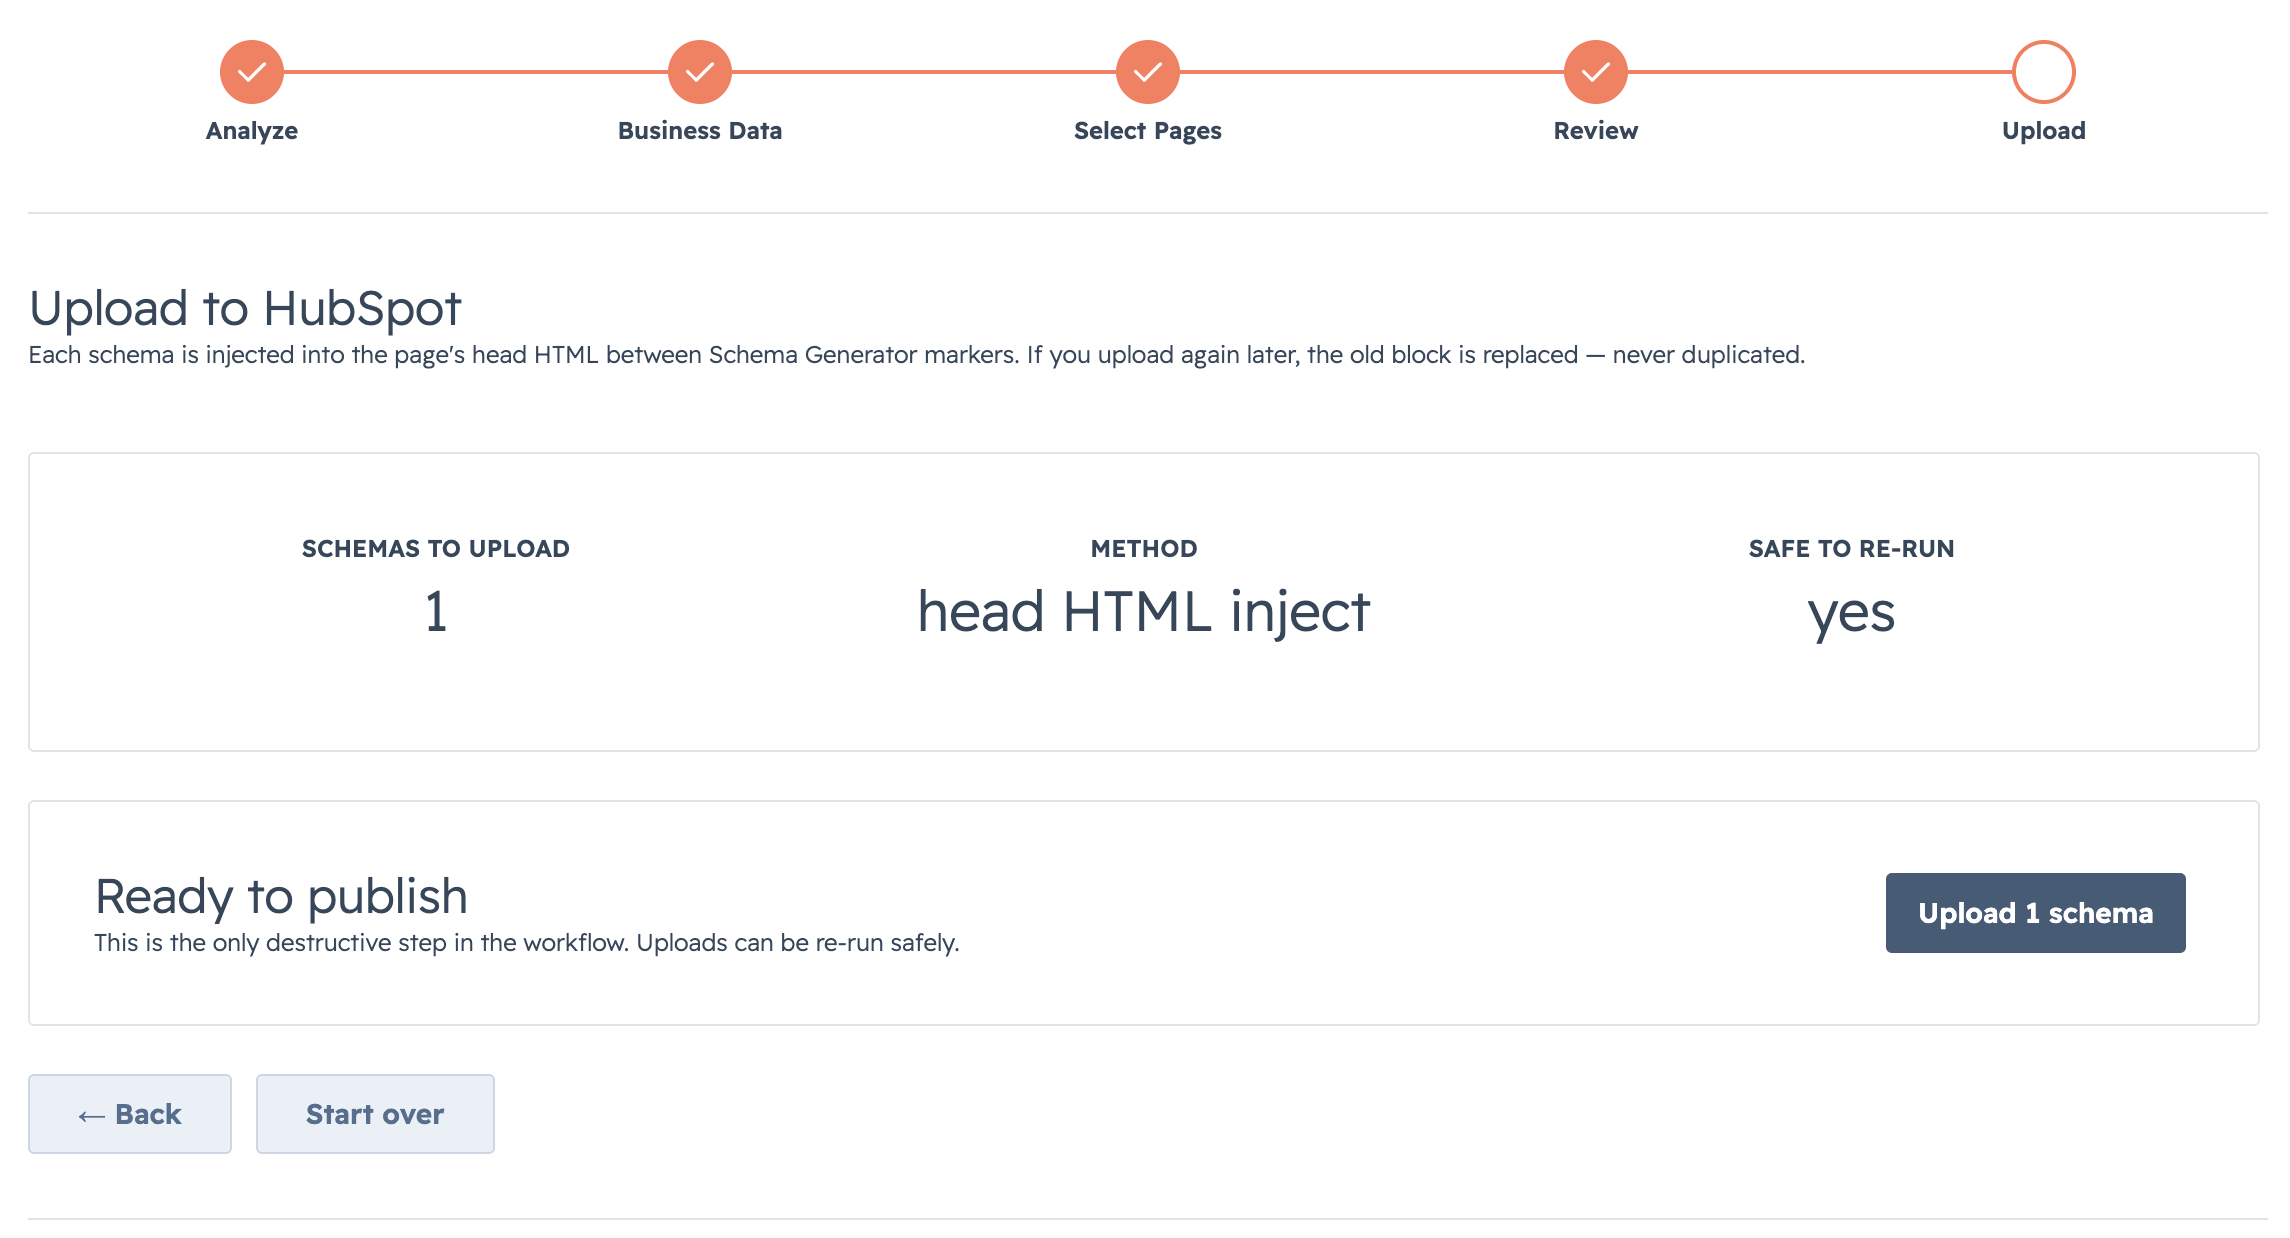
<head>.Click Upload Schemas. The app:
- Connects to HubSpot's CMS API
- Reads each page's current
headHtmlfield - Strips any existing JSON-LD blocks (so you don't get duplicates)
- Inserts the new JSON-LD
- Saves the page
If a page is currently published, the new schema is live within seconds. If it's a draft, the schema goes live when you next publish.
Once uploaded, verify in Google's Rich Results Test: Google Rich Results Test paste your URL, click Test. The schema should validate.